

Hello guys! I continue to explore the world of DIY and as I mentioned in my recent post about wallpaper trends, I was going to revamp a shoe cabinet using self-adhesive wallpaper. So it’s done, and it actually came out better and prettier than I expected! And keep in mind that I’m really not the handiest person out there, and if I was able to pull it off, it means that pretty much anyone can! So I can absolutely recommend self-adhesive wallpaper as a simple and affordable means to revamp a piece of furniture. Here’s the whole story.
How I revamped a shoe cabinet with self-adhesive wallpaper
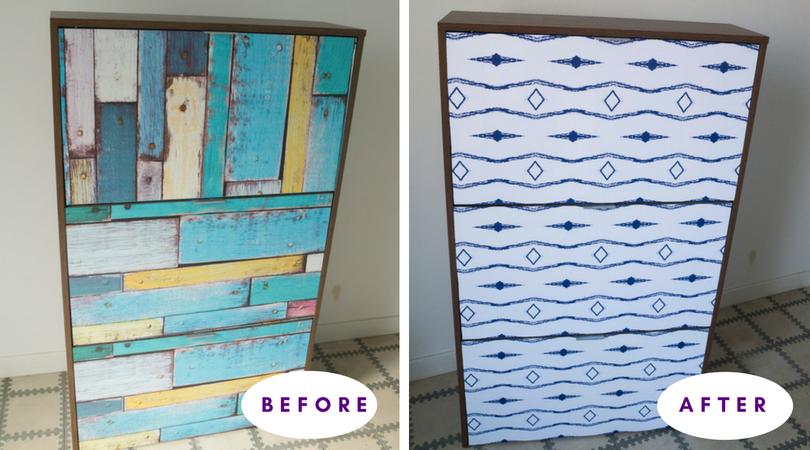
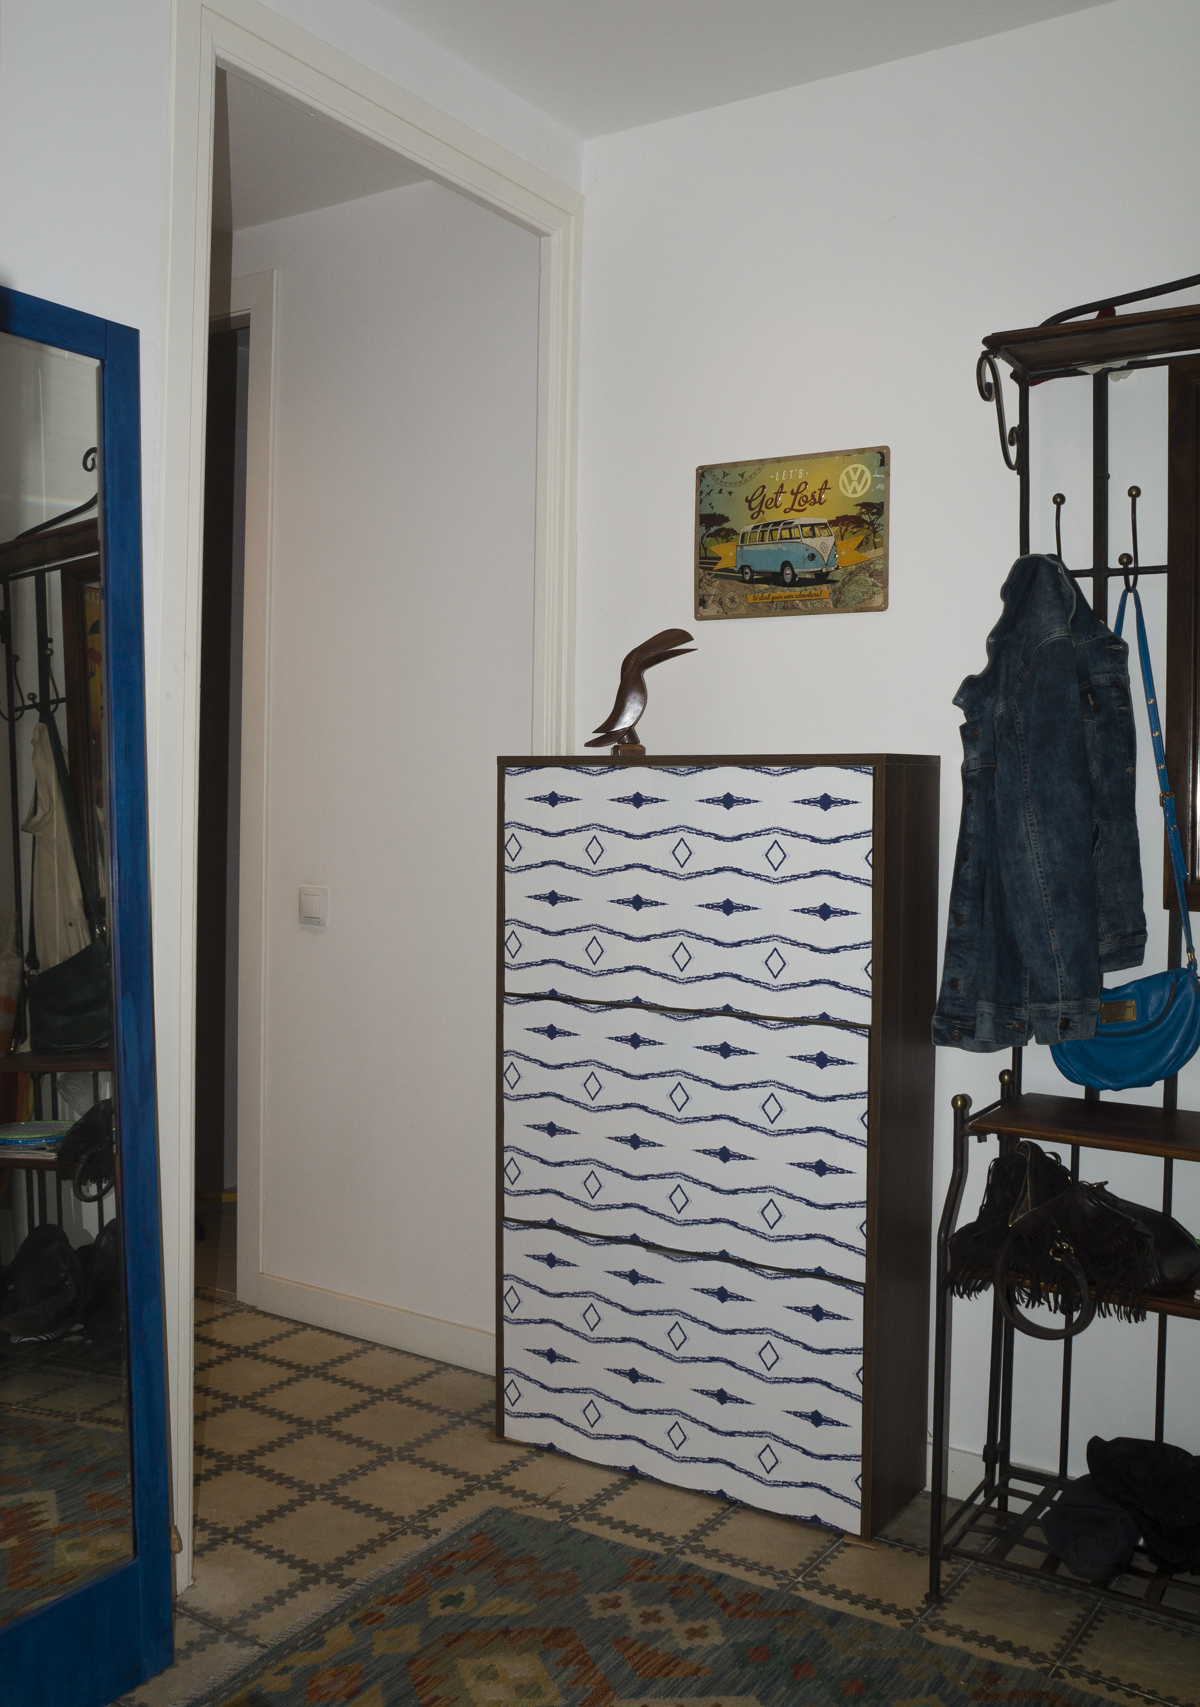
I have a shoe cabinet I purchased from Conforama. At first I loved it, it was original, an imitation of aged painted wood, although it’s actually paper. But with time it lost its charm to me, I thought it looked cheap and not really matched the new items I got for my entry way, such as the vintage telephone table with seat that I had re-upholstered or the beautiful Afgan rug I found in Madrid.
My experience on Etsy
So when I discovered etsy.com and the endless choice of self-adhesive wallpaper I knew exactly what I should do to that shoe cabinet. Get it a makeover with new wallpaper! I spent hours and hours on Etsy until I decided on this white-blue “bohemian” pattern, as they call it. In case you don’t know Etsy, it is a marketplace where artists and small businesses can sell their designs, so it’s made up of hundreds of different mini-shops. I browsed literally all the shops selling self-adhesive wallpaper, and USA has some amazing stuff, but the customs authorities in Spain are quite strict, so I thought I’d rather play it safe and choose something from European stores. My only worry about BohoWalls was that they claim they ship from Switzerland (which is not a member of EU), but then the actual package I received was shipped from Latvia, so I had no problems with customs.
Making the pattern work
When choosing the paper the problem I had was that the standard width is around 53cm, and I needed 71cm, so unless I requested wider custom size (which was a possibility, but I wasn’t ready to pay for it, being an experiment, I wasn’t sure I’d pull the whole thing off at all!), I had to find a pattern which could be used horizontally. This one looked perfect, although I had my doubts as to whether the pattern would work after I cut it, and in retrospective I believe I should have given it way more consideration, but apparently I’ve had beginner’s luck, in the end the pattern came together perfectly! Also I was lucky they had a 30% sale, so altogether the paper (53cm by 243cm) + shipping cost me around 55€.
I’m very pleased with the quality. The pattern looks exactly the same as on the images, and its adhesive performance was beyond my expectations! To get it right I had to stick and unstick each of the three pieces I cut out a million times, and it still looked perfect, exactly what a rookie needs. I really can’t imagine trying to do the same with a paper that needs glue, rather than self-adhesive wallpaper. It would be a disaster, absolutely.

What next?
I’m so pleased with the results of this little project, that I now want to do the same thing to a white chest of drawers from IKEA in my bedroom. I’ve always thought it’s a bit plain and screams IKEA.
The cool thing about self-adhesive wallpaper is that it’s really easy to deal with. You have a virtually endless amount of attempts to get it right, no need to use a glue, and it can be removed very easily when you’re ready for a change. Also, if your budget allows it, my advice is to order the paper in your custom size. This will make things even easier and save you a lot of time and effort.
This is how it looks in my entryway! What do you think? 🙂


No Comments